Connecting eprints repository to ORCID for consortium members
Obtaining credentials for your eprints plug-in
Membership of ORCID is required to use the ORCID Support Advance plug-in. Institutions that are members of the UK ORCID consortium should apply for credentials from ORCID using the credential request form.
For those institutions that manage their own instance of eprints and are installing the plugin, a demo needs to be set up against the ORCID Sandbox, and credentials will be supplied after screenshots are sent for review.
We recommend you read through our blog post on connecting vendor systems which provides further background information on applying for credentials. An overview of the plugin for eprints is available on the Jisc UK ORCID support blog post about the release of the ORCID advance support plug in and its features, and there is detailed documentation on the eprints ORCID support advance wiki. Further instructions specific to obtaining ORCID credentials for eprints software are as follows:
Eprints instance managed by the institution
If you run your own instance of eprints.org and have installed the plugin:**
**Note you will need to take screenshots as you follow these steps. List of screenshots is added below.
- Step 1: You need to set up your plugin to test against the ORCID Sandbox. Register to use the Sandbox
Using a test account in your eprints.org instance, connect to ORCID – you can create a test ORCID Sandbox account directly from eprints with an [email protected] email address - Step 2: Add some works for your user in eprints
Export those works to ORCID - Step 3: Add some works to the ORCID account using the ORCID web interface (you could also use the search and link wizards or import from Bibtex). See: https://support.orcid.org/hc/articles/360006973653-add-works-by-direct-import-from-other-systems and https://support.orcid.org/hc/articles/360006894794-importing-works-from-a-bibtex-file Import the works you added to your ORCID record in this step into eprints using ‘Import from ORCID’
- Step 4: Send the screenshots to: [email protected]
Once the screenshots have been approved, you can request production credentials using this form:
https://orcid.org/content/register-client-application-production-trusted-party
Make sure to mention that you have already provided the required screenshots. - Remove any test data (e.g. Sandbox ORCID IDs) from any public-facing pages in eprints before moving to production.
List of screenshots needed:
At Step 1:
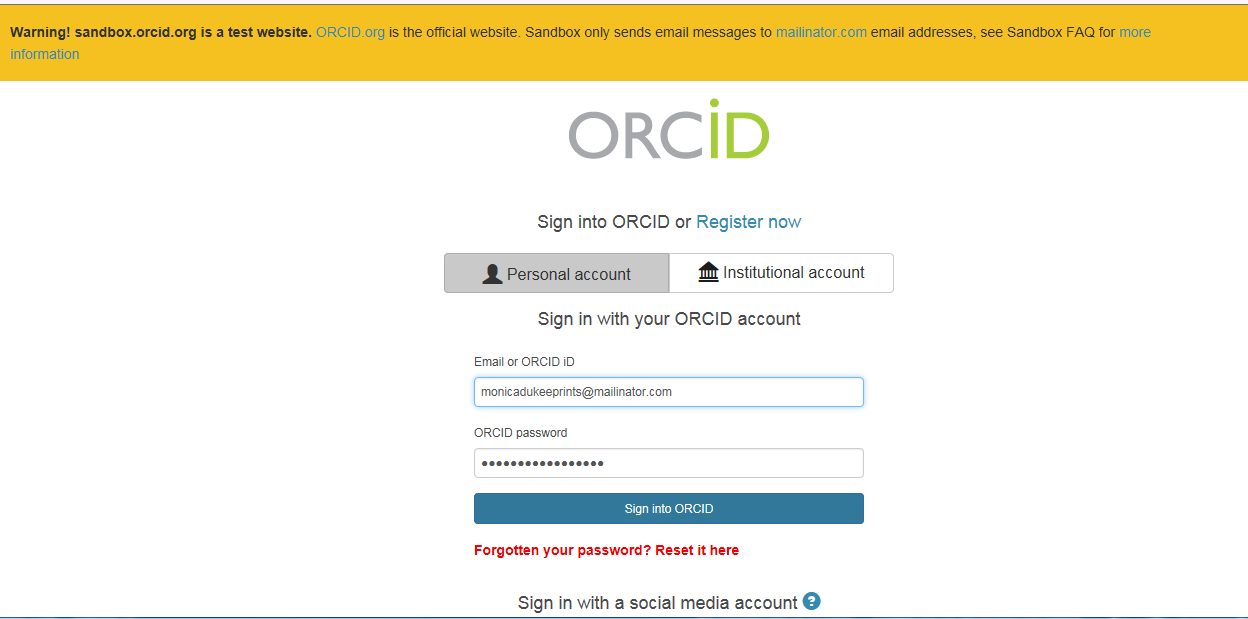
Two screenshots for the authentication screens Example 1 Example 2
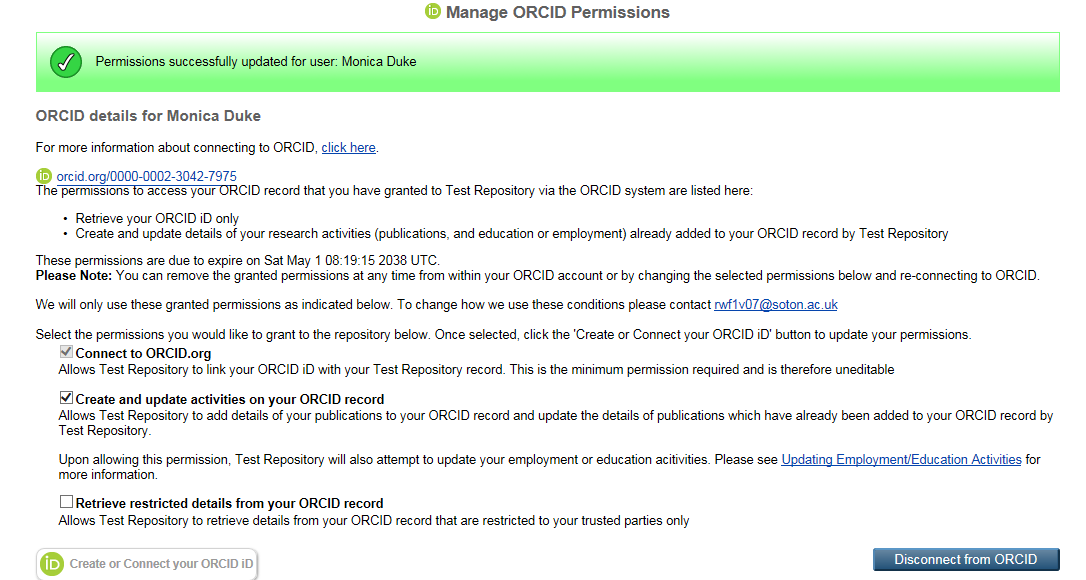
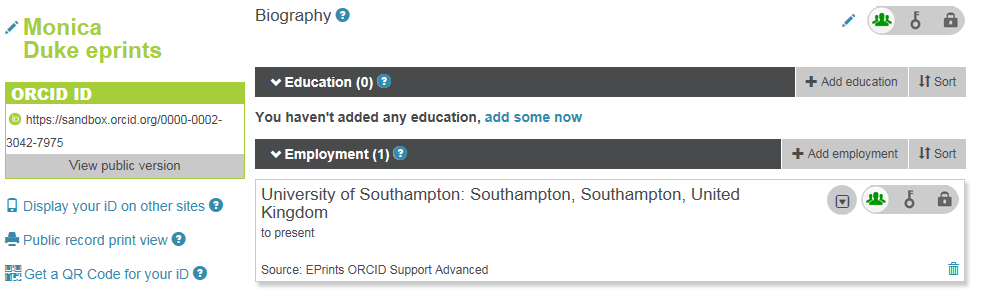
A screenshot of the user record in the ORCID Sandbox showing their affiliation (which has been added automatically by eprints) after the user signs in or creates a record.
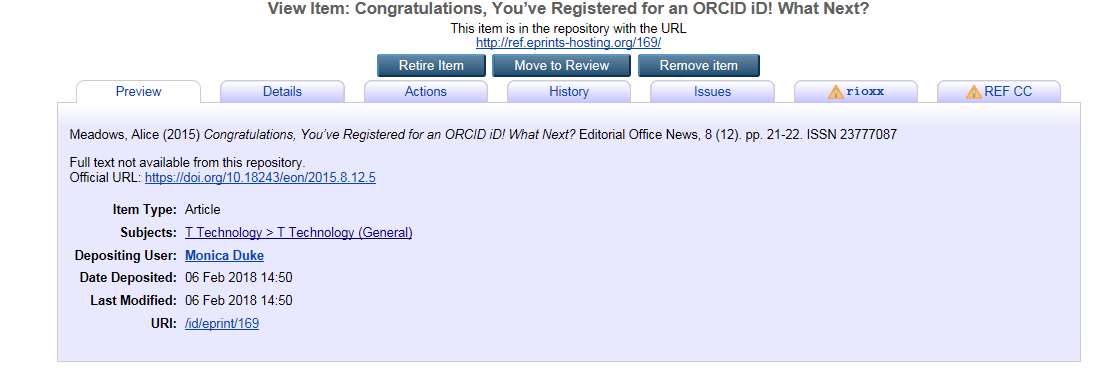
At Step 2: Screenshot from ORCID Sandbox showing a work that has been exported from eprints to the Sandbox
At Step 3: A screenshot of the work that has been imported from ORCID into eprints
Additionally, Author ORCID ID display (or icon) in any screens where the author appears, e.g.
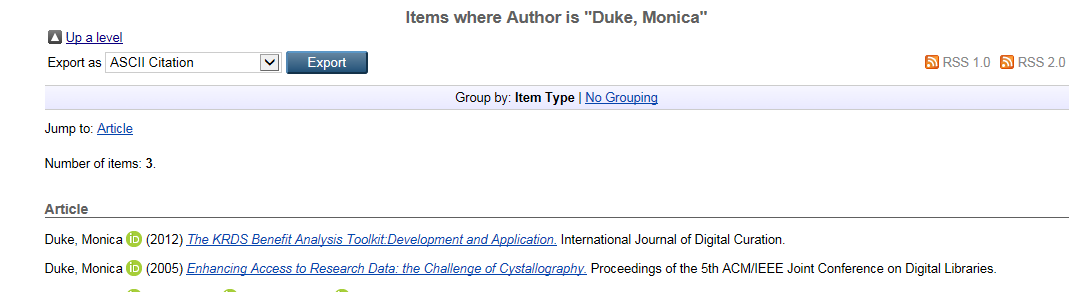
- Browse by author/Items by author
- Browse by subject/items by subject
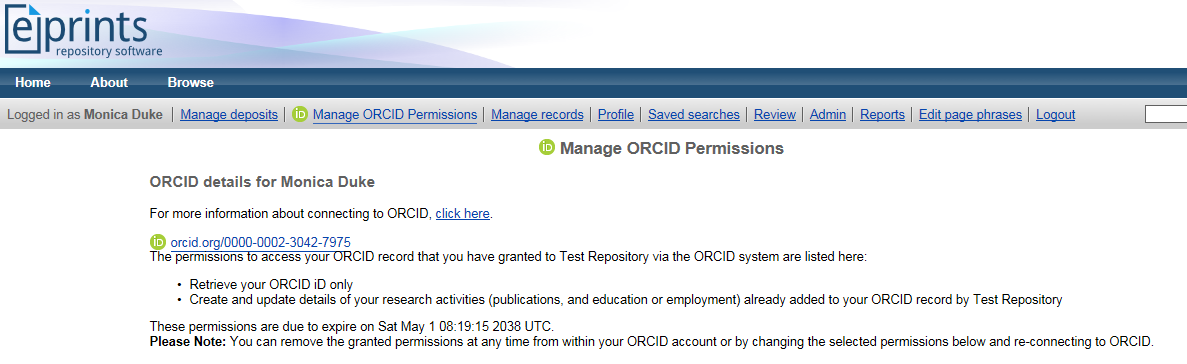
- Manage ORCID permissions (after user has connected to ORCID)
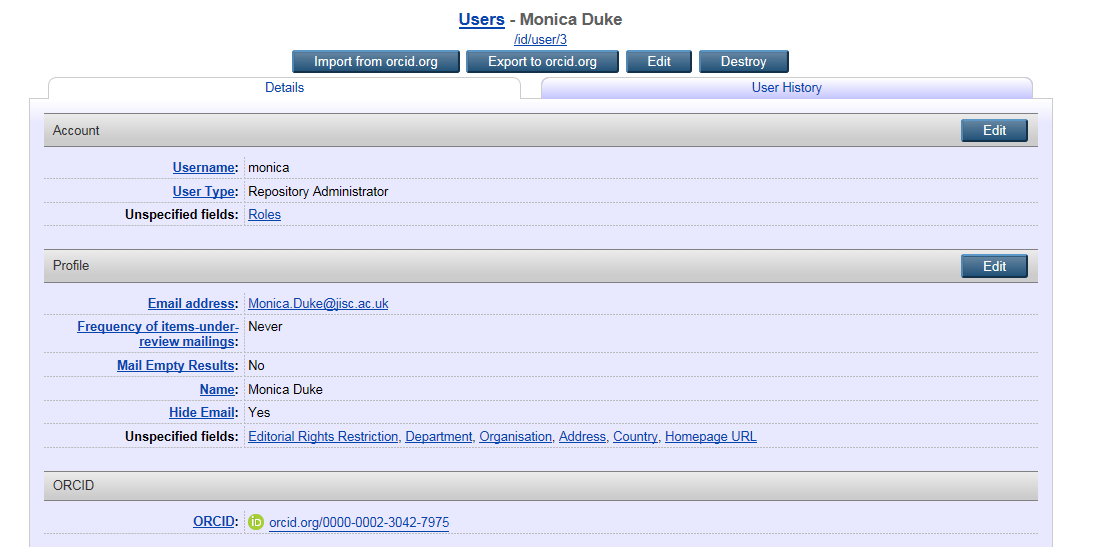
- User Profile page
- Summary abstract page
- Search results
Hosted services
If you are using a hosted eprints service, please go to the production credential request form and complete the required details, mentioning that you will be using a hosting service. Before issuing production credentials you will be requested to sign a service provider agreement between ORCID, the Service Provider and your organization. The ORCID team will respond with the relevant service provider agreement and production API credentials
The hosting service also needs to provide a statement (e.g. by confirming this in an email to you) that the plugin is being used out of the box and no changes to the functionality have been made. Please add the hosting service statement to the comments on the form when requesting credentials. Alternatively, an integration demo against the sandbox can be provided (see instructions in previous section).